
Setting PWM on Armbian for Fan Control: A Step-by-Step Guide
Thanks to ameriDroid Discord members macroalpha, stvhay, Pandaa, slaminger, fewt, and others for helping with the foundational work and to hammer out these details. Extreme props go out to macroalpha for his solid work on the Nova's GPIO functionality.
Armbian is a popular Linux distribution for ARM-based devices. In this guide, we'll show you how to set PWM on Armbian for fan control using the SYSFS method. Although these instructions are for Armbian on the Nova, they show the general steps needed on other Linux distributions on other SBCs as well with some slight modifications. We'll also show you how to add a section to the .dtb file for automatic fan control based on temperatures. Let's get started!
Step 1: Open a Terminal and Gain Root Access:
Open a terminal and type sudo su to gain root access.
Step 2: Navigate to the Rockchip Directory and Rename the Existing .dtb File:
Type cd /boot/dtb/rockchip to navigate to the rockchip directory. Next, rename the existing .dtb file by typing mv rk3588s-9tripod-linux.dtb rk3588s-9tripod-linux.dtb.bak .
Step 3: Download the New .dtb File and Save It in the Rockchip Directory:
Download the new .dtb file from https://cdn.discordapp.com/attachments/1072231684096933888/1099028185502461992/rk3588s-9tripod-linux.dtb and save it in the rockchip directory (/boot/dtb/rockchip).
Step 4: Reboot the Nova:
Type reboot to reboot your device.
Step 5: Navigate to the PWM Directory:
Open a terminal and gain root access again by typing sudo su . Next, navigate to the PWM directory by typing cd /sys/class/pwm/pwmchip15 .
Step 6: Export PWM and Set the Duty Cycle:
Type echo 0 >export to export the PWM. If this returns an error, this may already be active - so try skipping this step. Next, navigate to pwm0 by typing cd pwm0 . Set how many time slices to slice each interval of the duty cycle into by entering echo 1000000 >period . Set the duty cycle to 50% (this is how much of each tiny time slice to send power over the pin) by typing echo 500000 >duty_cycle .
NOTE: As of this writing, the PWM pins on the Armbian build for the Nova are initiated as inverse polarity, which means that higher numbers on the duty cycle will cause the fan to spin more slowly and lower numbers will cause it to spin faster.
Step 7: Enable the PWM: Type echo 0 >enable to enable the PWM. At this point, your fan should start spinning! If not, it is possible the polarity is not set to inverse, so try issuing the above command again with a 1 instead of a 0.

Step 8: Add the Fan Control Section to the .dtb File To add the fan control section to the above-referenced .dtb file for automatic fan control based on temperatures, add the following section to that file:
       fan0: pwm-fan {
               compatible = "pwm-fan";
               #cooling-cells = <2>;
               pwms = <&pwm11 0 10000 0>;
               cooling-levels = <0 64 128 255>;
       };

&pwm11 {
       pinctrl-0 = <&pwm11m1_pins>;
       status = "okay";
};
The above example uses pin 4 for power, 6 for ground, and 8 for PWM control. Thanks again to macroalpha for this information.
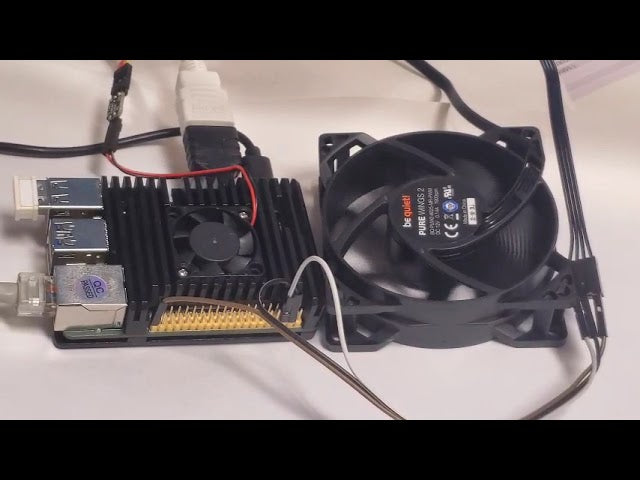
Below: Testing an 80mm PWM PC case fan on top of the Nova - Doesn't it fit nicely?
Below: Using a transistor circuit to support PWM control on a non-PWM fan in one of our early developer models
Conclusion: In this guide, we've shown you how to set PWM on Armbian for fan control. We've also shown you how to add a section to the .dtb file for automatic fan control based on temperatures. By following these steps, you can ensure that your device stays cool and performs optimally.
Leave a comment