
How-To: 4.1 inch 800x480 USB2 Display - Capturing and displaying desktop
Share
Introduction
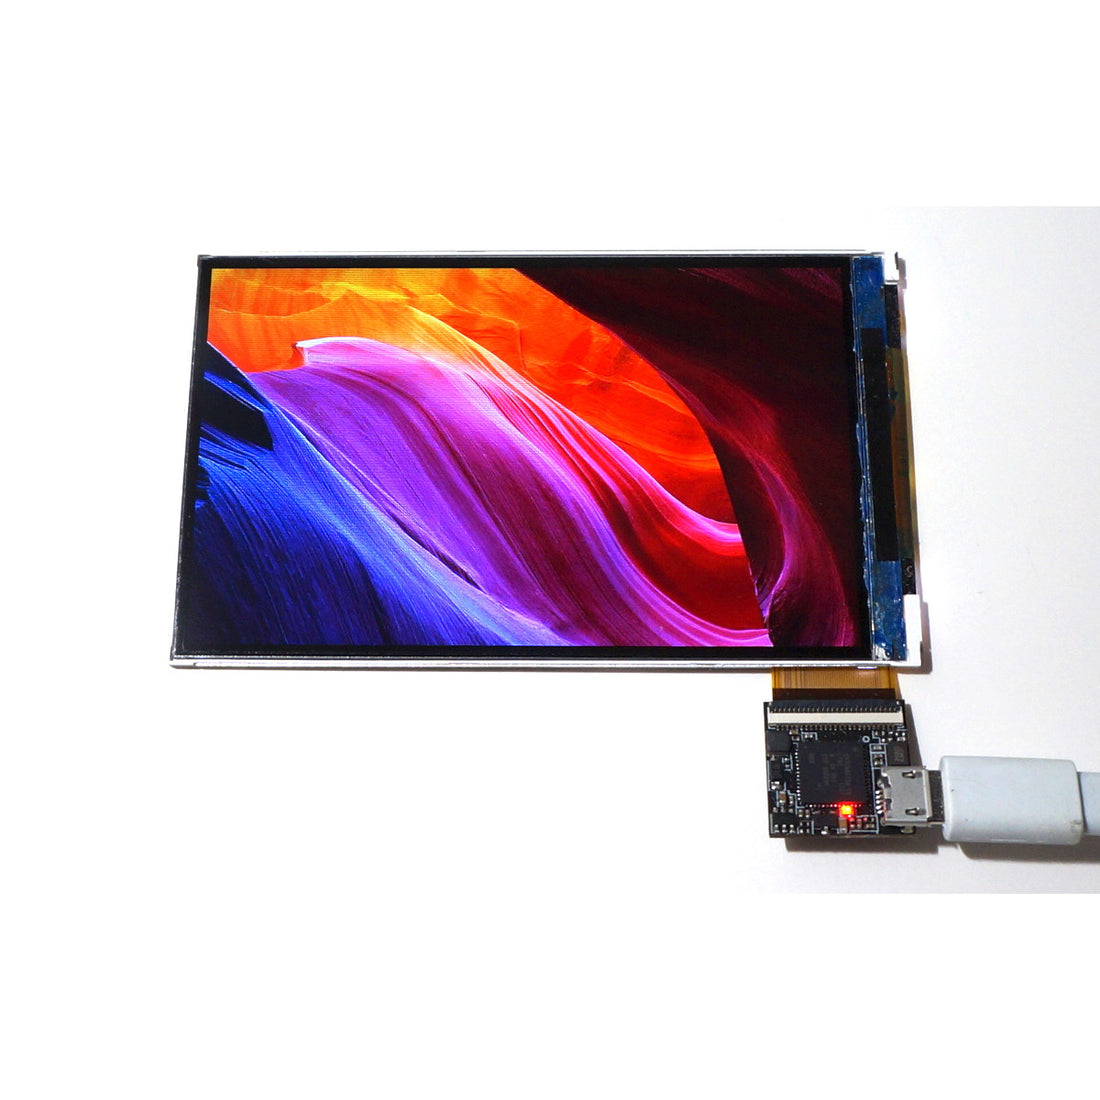
The VoDisplay works best with a 24-bit BMP image. In order to capture your screen and display it on the VoDisplay, it is currently required to create an image in this format before displaying it.
Installing Prerequisites
These prerequisites assume the system is running Ubuntu or similar OS. scrot is a utility to capture a screenshot from the command line or script. graphicsmagick is a command-line utility used to modify graphics files. v2screen is a utility to display a BMP file on the VoDisplay.
sudo apt update
sudo apt install scrot
sudo apt install graphicsmagick
wget http://vonger.cn/misc/screen/v2screen.tar.xz
tar xf v2screen.tar.xz
cd v2screen/demo/raspi
sudo cp vodisp /usr/bin/.
sudo chown root:root /usr/bin/vodisp
sudo cp libvodisp.so /lib/.
If you are installing on a 64-bit ARM Linux system, like the ODROID-C2, you will want to perform the following commands as well, to allow 32-bit binaries to run on the 64-bit OS:
sudo dpkg --add-architecture armhf
sudo apt update
sudo apt install libc6:armhf libncurses5:armhf libstdc++6:armhf libusb-1.0-0-dev:armhf
(I'm not sure if all 4 of those libraries are required, but it should work if you install all 4 of them.)
In a future article, I'll attempt to figure out how to capture a "virtual" screen on a headless system. But for systems that already have a display, you can run the following commands to capture the current screen:
scrot screen.png
This takes a screenshot of the current screen and saves it as screen.png
gm convert screen.png -flip -resize 800x480! -rotate 270 PNG24:screen2.png
This uses Graphicsmagick to take the PNG file generated by scrot and modify it and save it as a 24-bit PNG file (instead of a 32-bit PNG which isn't supported by vodisp)
gm convert screen2.png screen.bmp
I couldn't find a way to get Graphicsmagick to convert to a 24-bit graphics file and also simultaneously convert to a BMP file, so I had to break it up into two commands. The above command simply takes the 24-bit PNG and saves it as a 24-bit BMP.
sudo vodisp bitmap screen.bmp
If everything installed correctly, the red LED on the VoDisplay USB board should light up and a few seconds later, the screenshot should appear on the display. This will be a static screenshot and won't update until you run the above commands again. If you want to run all the commands in one line, you can like this:
scrot screen.png && gm convert screen.png -flip -resize 800x480! -rotate 270 PNG24:screen2.png && gm convert screen2.png screen.bmp && sudo vodisp bitmap screen.bmp
If you want to continually capture screenshots and display them, you can with the following steps:
nano screen2vodisplay.sh
Once the editor opens up, enter the following lines:
#!/bin/bash
while true; do
scrot /run/screen.png
gm convert /run/screen.png -flip -resize 800x480! -rotate 270 PNG24:/run/screen2.png
gm convert /run/screen2.png /run/screen.bmp
vodisp bitmap /run/screen.bmp
done
Once entered, make sure to save it (CTRL-O CTRL-X if you are using nano). To run it, enter the following:
sudo ./screen2vodisplay.sh
In my experience, this puts out about 1 frame per second on the ODROID-XU4 or ODROID-C2. I haven't tested it on any other systems yet.
In order to stop the captures, you may have to press CTRL-C more than once in order to catch the script at the right moment.
As stated above, in a future article, I'll attempt to figure out how to display stats on the VoDisplay. Have fun!