How-To: Raspberry Pi 4 as a Multiplayer Minecraft Server
Share
Video below shows how to setup your Raspberry Pi 4 Minecraft server, and demonstrates the performance, complete with in-game footage.
Robbie Ferguson and Jeff Weston from Category5 Technology TV have been wondering whether a Raspberry Pi 4 would be powerful enough to host a dedicated multiplayer Minecraft server. Sure, it'll run - but can it run well? Can it replace the need to pay for 3rd party Minecraft server hosting?
Having built, optimized, overclocked and tested a few iterations of a test server, a final default configuration was decided upon. In typical Cat5TV style, Robbie then retraced his steps and wrote a Linux script to take care of all the dirty work for you. Now, with a few quick commands and a bit of compile time, you'll be up and running with your very own overclocked Raspberry Pi-powered Minecraft server.
The Minecraft installer script is called Pinecraft.
Spigot was selected as the server version to install. Unlike installing the vanilla java server from Mojang, Spigot promises better performance overall, and the ability to add plugins such as anti-griefing, mini-game modes, admin tools, and more.
In the video below, Robbie Ferguson shows us how to use Pinecraft to set up a Raspberry Pi 4 Minecraft server, along with multiplayer gameplay footage to demonstrate the performance.
Here's what you need:
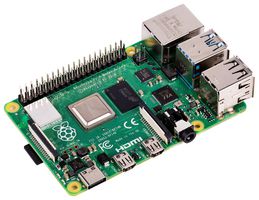
A Raspberry Pi 4. Either a 4 GB or 8 GB model are required, although Robbie makes note that until the 64-bit version of Raspberry Pi OS Lite is released, Java (which runs the Minecraft server) can only take advantage of 4 GB RAM. Our suggestion is to lean toward the 8 GB model for future-readiness since it will work with the 32-bit OS just fine for now, and then you can upgrade your software for free when it becomes available. Though a 4 GB version will work just fine, as you'll see in the video below.
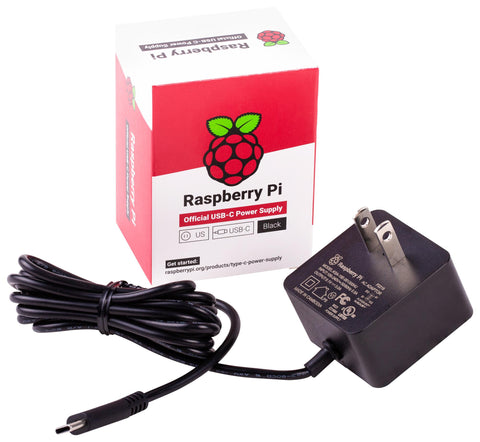
A solid power supply for the Pi 4 suitable for overclocking.
You'll also need:
- A case (preferably one with active cooling),
- heat sinks, and
- a fast and reliable MicroSD card.
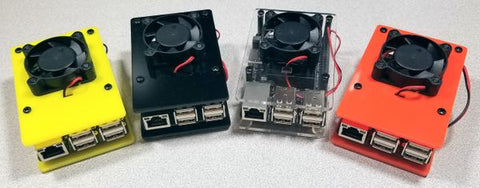
We carry these great open-concept SBC cases that are compatible with the Raspberry Pi 4. They offer excellent airflow, and allow you to add a fan (sold separately). Remember, Pinecraft overclocks the Raspberry Pi 4, so active cooling is highly recommended.
Once you have your hardware, flash a Debian-based server distro for your Raspberry Pi 4. Robbie recommends Raspberry Pi OS Lite for this purpose, and that's what he used in the video. Do not use a distro that includes a desktop interface since your Minecraft server needs all the resources of the Raspberry Pi. Once the 64-bit version of Raspberry Pi OS Lite is available, that will be the way to go. For now, the default 32-bit will work (with the above-mentioned caveat regarding the 8 GB model).
As a side note, while yet to be thoroughly tested, Robbie also claims Pinecraft can be run on a PINE64 RockPro64 to turn it into a MInecraft server, which is what inspired the "Pinecraft" name. If this is something you'd like to see, be sure to comment on the video to let the producers know. We'd love to see them test Pinecraft on several different single board computers. Just note that at this time, Pinecraft only overclocks Raspberry Pi 4 systems.
In this video, you'll learn how to setup your own Raspberry Pi 4 Minecraft server using Pinecraft, plus Robbie and Jeff will put it to the test by having their kids join to see how it performs.
BONUS CONTENT
Robbie and Jeff discussed the server performance, an idea to increase I/O throughput, and provide a little more gameplay footage, including the one moment amidst more than an hour of gameplay where the Raspberry Pi choked up while attacking zombies in an underground mine. Here is that bonus video:
Will you be setting up your own Minecraft server on a single board computer? Have you already got one running? What has your experience been? We look forward to your comments.


6 comments
Cheers!
I run a Server on a Raspi 4B 8GB 6bit with a 560mb/sec ssd and have zero issues. Neighter my friends playing on it. No glitches or whatsoever. It actually also has a TS3-Server running too. The Minecraft server has got 6144MB RAM dedicated.
to anyone reading this in the future, there is an updated version.
https://youtu.be/1A4FtaiNkrg
can i put my own minecraft world
What do you think about a modded minecraft world ?
@Graham if you’re attempting to connect from within your local network, your router’s firewall shouldn’t come into play, though your computer or other device may have firewall settings blocking it. If you’re attempting to connect to your server from outside of your network, then you’ll need to configure routing rules on your router since 192.168.1.123 is a local IP address (can’t be reached from outside your network normally). For this you’ll need to configure port forwarding or port triggering or something along those lines, and you’ll need to connect using your external IP address or domain name. If you have a dynamically assigned IP address (most internet service providers do this by default, unless you ask and/or pay extra for it) you may be able to sign up for a dynamic DNS service, which gives you a domain name and automatically updates the IP address that it resolves to when changes to your ISP-provided IP address occur.