
VoDisplay Screen
Reach out to us for more information
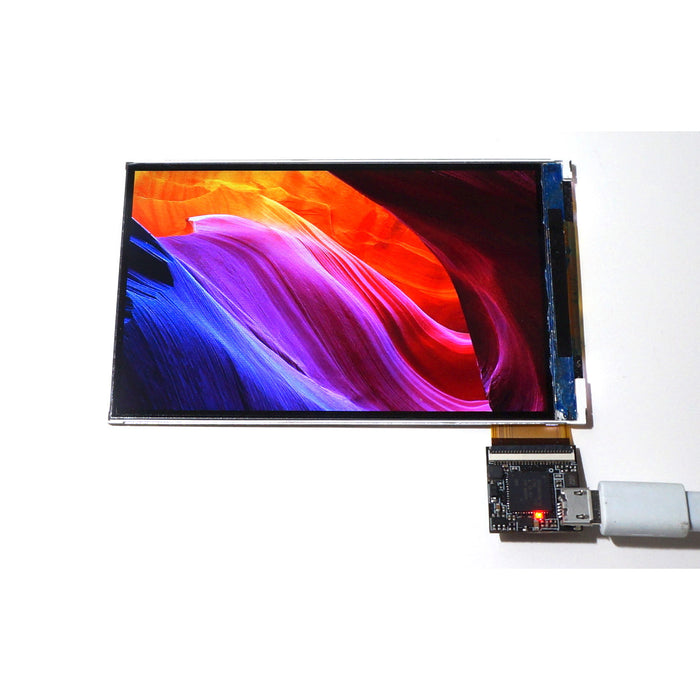
The VoDisplay Screen is a super fast screen (by USB2.0 standards) for high quality display usage for embed devices. It uses a USB2.0 port to display real color(24bit) at 25fps, and is fit for video. It is designed for any device that does not have MIPI, HDMI or other video interfaces, but only a USB 2.0 interface.
KEY FEATURES
- SIZE - 97mm x 58mm
- DISPLAY SIZE - 86mm x 53mm, 4inch
- INTERFACE - USB 2.0 480MHz
- COLOR - 24bit, 16bit, 8bit
- RESOLUTION - 800 x 480
- FPS - 25 (at 24bit color)
- TOUCH PAD - not supported
- DRIVER - framebuffer
- POWER SUPPLY - microUSB 5.0V
- POWER CONSUMPTION - normally 0.5watt
NOTES
- WARNING: There are two types of screen. Please check the screen type before use. The FPC connector cannot be reversed. If it is connected in the wrong direction, the screen will be destroyed.
- WARNING: FPC connector on the screen is fragile. Be careful when removing USB cable in order to not damage, break or tear the connector ribbon.

TUTORIAL
Connect to VoCore2
1. Prepare a common USB 2.0 cable with microUSB port, make sure the cable has data wires (some USB cables are only for charging and do not have data wires which will not work with this screen).
note: screen type is on the FPC of screen, currently we have two types, 'vocore2' for big endian, 'djn1522' for little endian.
2. Copy vocore2/fbusb.xxxx.ko in SDK to your VoCore2 /lib/modules/4.14.95/fbusb.ko (xxxx is the screen type, rename it to fbusb.ko)
3. Call 'echo fbusb > /etc/modules.d/01-fbusb' in VoCore2 console.
4. Power off VoCore2 and connect the screen with USB cable to VoCore2's USB port.
5. Connect VoCore2 to 5V power, then around 10~15 seconds, you can find VoCore2 logo on the screen, also a cursor flash at screen corner, then we know it works.
note: fbusb will map screen to /dev/fb0.
Run Console on Screen (first picture)
1a. If your screen back mark is 'djn1522', upgrade your VoCore to this new firmware
1b. If your screen back mark is 'vocore', upgrade your VoCore to this new firmware
2. Reboot VoCore (log output to UART2 and screen).
Note: You will need a USB hub and USB keyboard to use console.
Connect to Raspberry Pi or similar SBC
1. Prepare a common USB 2.0 cable with microUSB port (make sure it has data wires - some USB cables are only for charging and will not work with this)
2. Copy raspi/fbusb.xxxx.ko in SDK to your Raspberry Pi (xxxx is the screen type)
3. Call 'sudo insmod fbusb.xxxx.ko', if success, you can find fbusb log in dmesg, and the screen will show logo.
Note: fbusb will map screen to /dev/fb1.
Try framebuffer
fbusb uses 16bit color.
1. Set screen to black: dd if=/dev/zero of=/dev/fb0 bs=1000 count=768
2. Set screen to random pixels: dd if=/dev/urandom of=/dev/fb0 bs=1000 count=768
Note: On VoCore, it is /dev/fb0; on raspi, it is /dev/fb1.
LINKS
- ameriDroid Learn - https://ameridroid.com/blogs/ameriblogs/tagged/vocore
- Sources - http://vonger.cn/misc/screen/v2screen.tar.xz
- Old Sources - http://vonger.cn/misc/screen/
VIDEOS
Warranty is valid for two weeks, starting upon date of receipt.