Pinecraft: Minecraft Java Server Installer for Raspberry Pi, PINE64 and Other SBCs.
Share
Why should I run my own Minecraft server?
Minecraft natively only allows users to invite ten other players into a world. A server on the other hand does not have any limitations besides the resources needed to run it. You can even add mods and other unique features to your liking.
What do I need to run my own Minecraft server?
You can run a Minecraft Server with a ROCKPro64, a Raspberry Pi 4, or other SBC with at least 4GB of RAM (ODROID-C4, Banana Pi M5, ROCK PI 4, etc.).
Can you tell me how to install it?
Yes! First we will need to get a Linux based distribution for your selected SBC. Check the LINKS section of the SBC of your choice on our webstore to find where to download the operating system for it. Select the newest Linux distribution - Armbian / Debian / Ubuntu are good choices.
Make a note of the default username and password of the Linux distribution you are downloading - you will need this later.
After downloading the operating system image, write it to your installation media (microSD or eMMC).
How-To: eMMC and microSD Card Writing
We'll use the Pinecraft installer as it simplifies the installation and setup of the Minecraft Java Server.
When you need to update the server in the future, simply run the Pinecraft installer again to upgrade to the latest version.
The simplest method to run the Pinecraft installer is by being directly connected to the SBC to be used as the server.
When booting the SBC with a keyboard / monitor connected, it should either boot directly into a terminal where you can type commands, or into a desktop operating system. If it boots into a desktop operating system, open the start menu and find a terminal program like xterm, Lxterminal, etc. If you are using this method, skip the next paragraph and continue on with the rest of the instructions.
If instead you are installing Pinecraft server on the SBC from another computer on the network, you will need to find the SBC's IP. You can check that in your router's DHCP table or by using a program such as "Angry IP Scanner" from another computer on the network. Once you find the IP address of your device, connect using "ssh root@your_ip" - replace "root" if necessary with the default username for your Linux distribution noted above.
After that, update the repositories and install git, using command "sudo apt update" and "sudo apt install git"
Now we need to make sure that we are in the home folder using command "cd ~" and then run "git clone https://github.com/cat5tv/pinecraft"
Get into the pinecraft folder by using command "cd pinecraft/" and then run Pinecraft by running "sudo ./install" to get a screen like the one below.
After selecting OK, we will get the first question:

We recommend to install Paper, which supports plug-ins, installs very quickly and has been optimized to perform in SBC's (check out the details of each server type here).
Second question here, you can decide if you want a survival or creative mode.

Now you can insert your Linux Username for Server

Then accept the term and conditions

After that we will need to select our game seed:

Once we select the seed, we can decide if we want the server to load on boot

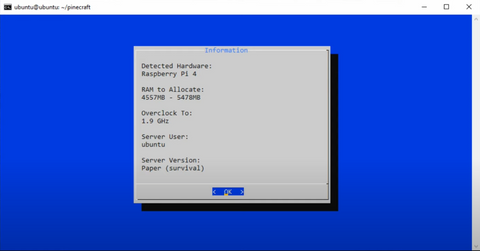
Next we will see a screen with just some information about our server

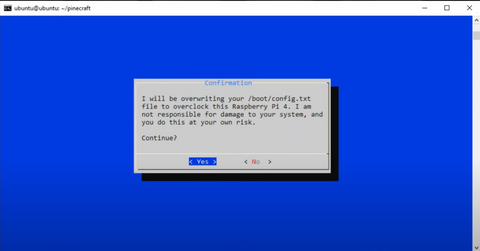
Lastly we will need to accept the risk of overclocking the device.

And just like that the installation will begin!! And when it's done we will get a notification like this.

If you want to make sure that your server is running, you can use command "/etc/init.d/pinecraft status" if it is running you will get a number 1, and a 0 if it is down.


