
How-To: Create RAID Array on Armbian/Debian-based Systems
Share
Backstory
Here at ameriDroid, we run our infrastructure on the products that we sell. This not only proves that it can be done, but also increases our expertise and familiarity with the products and available software. In addition, it helps us do our part in reducing our overall energy consumption as compared to running on "traditional" power-hungry infrastructure.
Our existing Cloudshell2 unit run by an ODROID-XU4Q is getting really close to having its 2x 1TB hard disk drives (HDDs) filled up. This is what it looks like right now:
# df -h |grep raid
/dev/sda        917G  870G  415M 100% /media/raid
In addition, we'd like to have a 2nd backup for this. Our plan is this:
- Build a new server with a RAID1 (mirrored disks) of 2x 4TB HDDs plus one spare 4TB HDD (in case one of the drives fails, we'll have a new drive to replace it with immediately)
- Copy the data from the Cloudshell2 to the new server
- Make the new server the primary file server
- Replace the 2x 1TB HDDs in the Cloudshell2 with 4TB HDDs
- Backup the data from the new server to the Cloudshell2 on a regular basis
- Potentially build a 2nd copy of the new system to use as additional capacity and to act as a failover in case of a major system failure
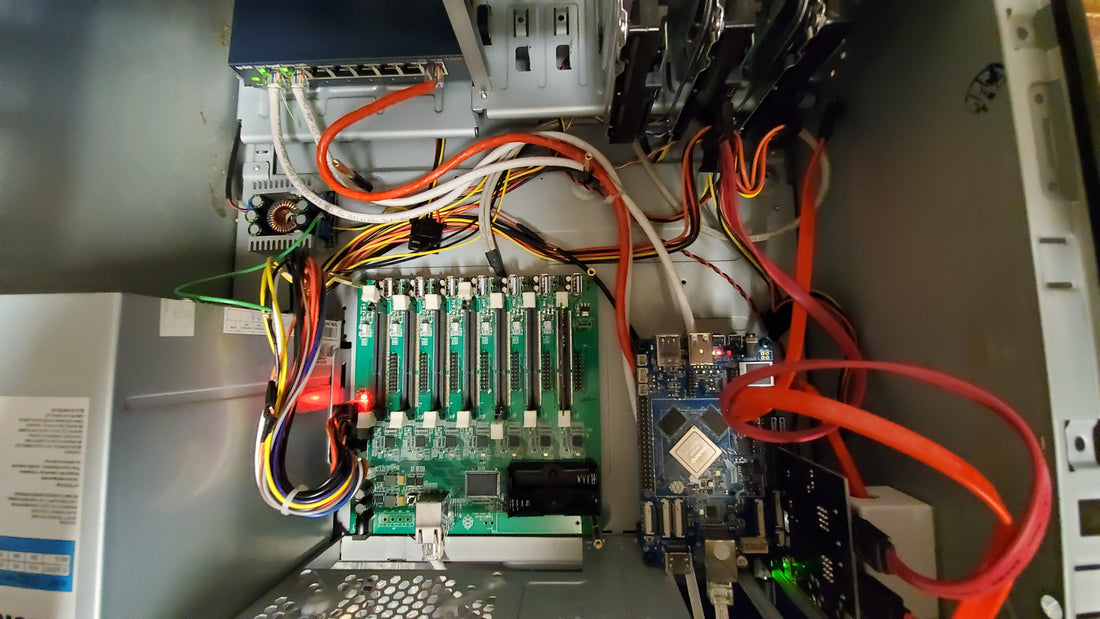
The main component of our new server is a ROCKPro64 with a PCIe dual-SATA card which controls the 4TB HDDs. We've loaded Armbian onto a 16GB eMMC to hold the main OS.
NOTE: The Cloudshell2 is a really easy way to set up a RAID and doesn't need any additional setup as it is all handled by the hardware, and the implementation is very well done as we've discovered in our disaster simulation tests. We're using the ROCKPro64 as part of a test to discover how much SBC power we can pack into an old-school mini-ATX tower.
How to create the RAID array
As usual, the Internet is our friend, but sometimes it can be difficult to find a really good article that gets straight to the point. Here's the article we used, and everything went smoothly for us following this guide, even using the latest versions of Debian, Ubuntu and Linux Mint in 2024.
Important Note
We've run into situations where the CMOS/BIOS/UEFI and/or OS overwrites RAID partition information upon boot when the RAID is built on raw disks (disks without pre-existing partitions).
If you find that your RAID is in a degraded state after booting, try the following:
- Use a program like gparted to remove all partitions from the disks to be used for the RAID
- Create a new partition that spans the entire disk - do this on each of the disks to be used for the RAID
- When specifying the disks to be used by mdadm for the RAID, instead of this:
sudo mdadm --create --verbose /dev/md0 --level=5 --raid-devices=3 /dev/sda /dev/sdb /dev/sdc
- do this instead (notice the numbers after the sda, sdb and sdc):
sudo mdadm --create --verbose /dev/md0 --level=5 --raid-devices=3 /dev/sda1 /dev/sdb1 /dev/sdc1